Use Splunk
Splunk is a third-party monitoring solution compatible with Besu. A Splunk server can receive Besu logs and enable complex search, visualization, and analysis.
Splunk can aggregate multiple logs in one place and run complex queries without being connected to the machine running Besu to read the standard output.
Options for running Splunk and Besu are:
Developer Quickstart with Splunk
To view the Quickstart network logs in Splunk:
- Start the Developer Quickstart with Besu, selecting Splunk monitoring.
- Open the Splunk UI.
Splunk Connect for Ethereum Docker Compose
To run a development Besu node and connect it to Splunk Enterprise, use the Splunk Connect for Ethereum demonstration Docker Compose environment provided by Splunk.
Requirements
A Splunk license is not required to use the Splunk Connect for Ethereum demonstration.
Steps
-
Clone the Splunk Connect for Ethereum repository:
git clone https://github.com/splunk/splunk-connect-for-ethereum.git
cd splunk-connect-for-ethereum -
Start the demonstration environment by following the Splunk Connect for Ethereum repository README.
noteSplunk enterprise takes some time to start.
Run
docker psand wait for theSTATUSof the 3 containers to beUp [number] seconds (healthy).CONTAINER ID IMAGE COMMAND CREATED STATUS PORTS NAMES
127600dd1173 splunkdlt/ethlogger:latest "ethlogger" 53 seconds ago Up 51 seconds (healthy) ethlogger
88dfcee683c4 splunk/splunk:latest "/sbin/entrypoint.sh…" 53 seconds ago Up 52 seconds (healthy) 8065/tcp, 8088-8089/tcp, 8191/tcp, 9887/tcp, 9997/tcp, 0.0.0.0:18000->8000/tcp splunk
111b0c6d6072 hyperledger/besu:1.4.4 "besu" 53 seconds ago Up 52 seconds (healthy) 8545-8547/tcp, 30303/tcp besu
Use Splunk Enterprise as a Docker container
Prerequisites
- Docker
- Besu 1.4.4 or later installed
A Splunk license is not required to use the trial version of the Splunk Docker image. The image is not suitable for production use and has restrictions on daily log volume.
If running Besu as a Docker container, consider using Splunk Connect for Ethereum Docker Compose or Kubernetes instead of the Splunk Enterprise trial container.
Steps
-
Start the Splunk Enterprise container:
docker run \
-e SPLUNK_START_ARGS=--accept-license \
-e SPLUNK_HEC_TOKEN=11111111-1111-1111-1111-1111111111113 \
-e SPLUNK_PASSWORD=changeme \
--rm \
-p8080:8000 -p8088:8088 \
-d \
--name splunk-demo \
splunk/splunk:latest
Once the service is started, connect on
http://localhost:8080/and login as theadminuser with a password ofchangeme.tipTo follow the logs of the Splunk container:
docker logs -f splunk-demo -
Create the Besu index:
- In the Splunk Web interface, navigate to the index list in the settings.
- Create an event index with an Index Name of
besu. - Leave other fields with the default values.
- Save the
besuindex.
-
Run Besu. To start a Besu node running in development mode, run the following command:
LOGGER=Splunk \
SPLUNK_URL=https://localhost:8088 \
SPLUNK_TOKEN=11111111-1111-1111-1111-1111111111113 \
SPLUNK_SKIPTLSVERIFY=true \
besu \
--network=dev \
--miner-coinbase=0xfe3b557e8fb62b89f4916b721be55ceb828dbd73 \
--miner-enabled \
--logging=trace
The environment variables specified send the Besu logs to Splunk. Only
LOGGER,SPLUNK_URL,SPLUNK_TOKENandSPLUNK_SKIPTLSVERIFYare required in this example. The complete list of options is in the Splunk options reference table. -
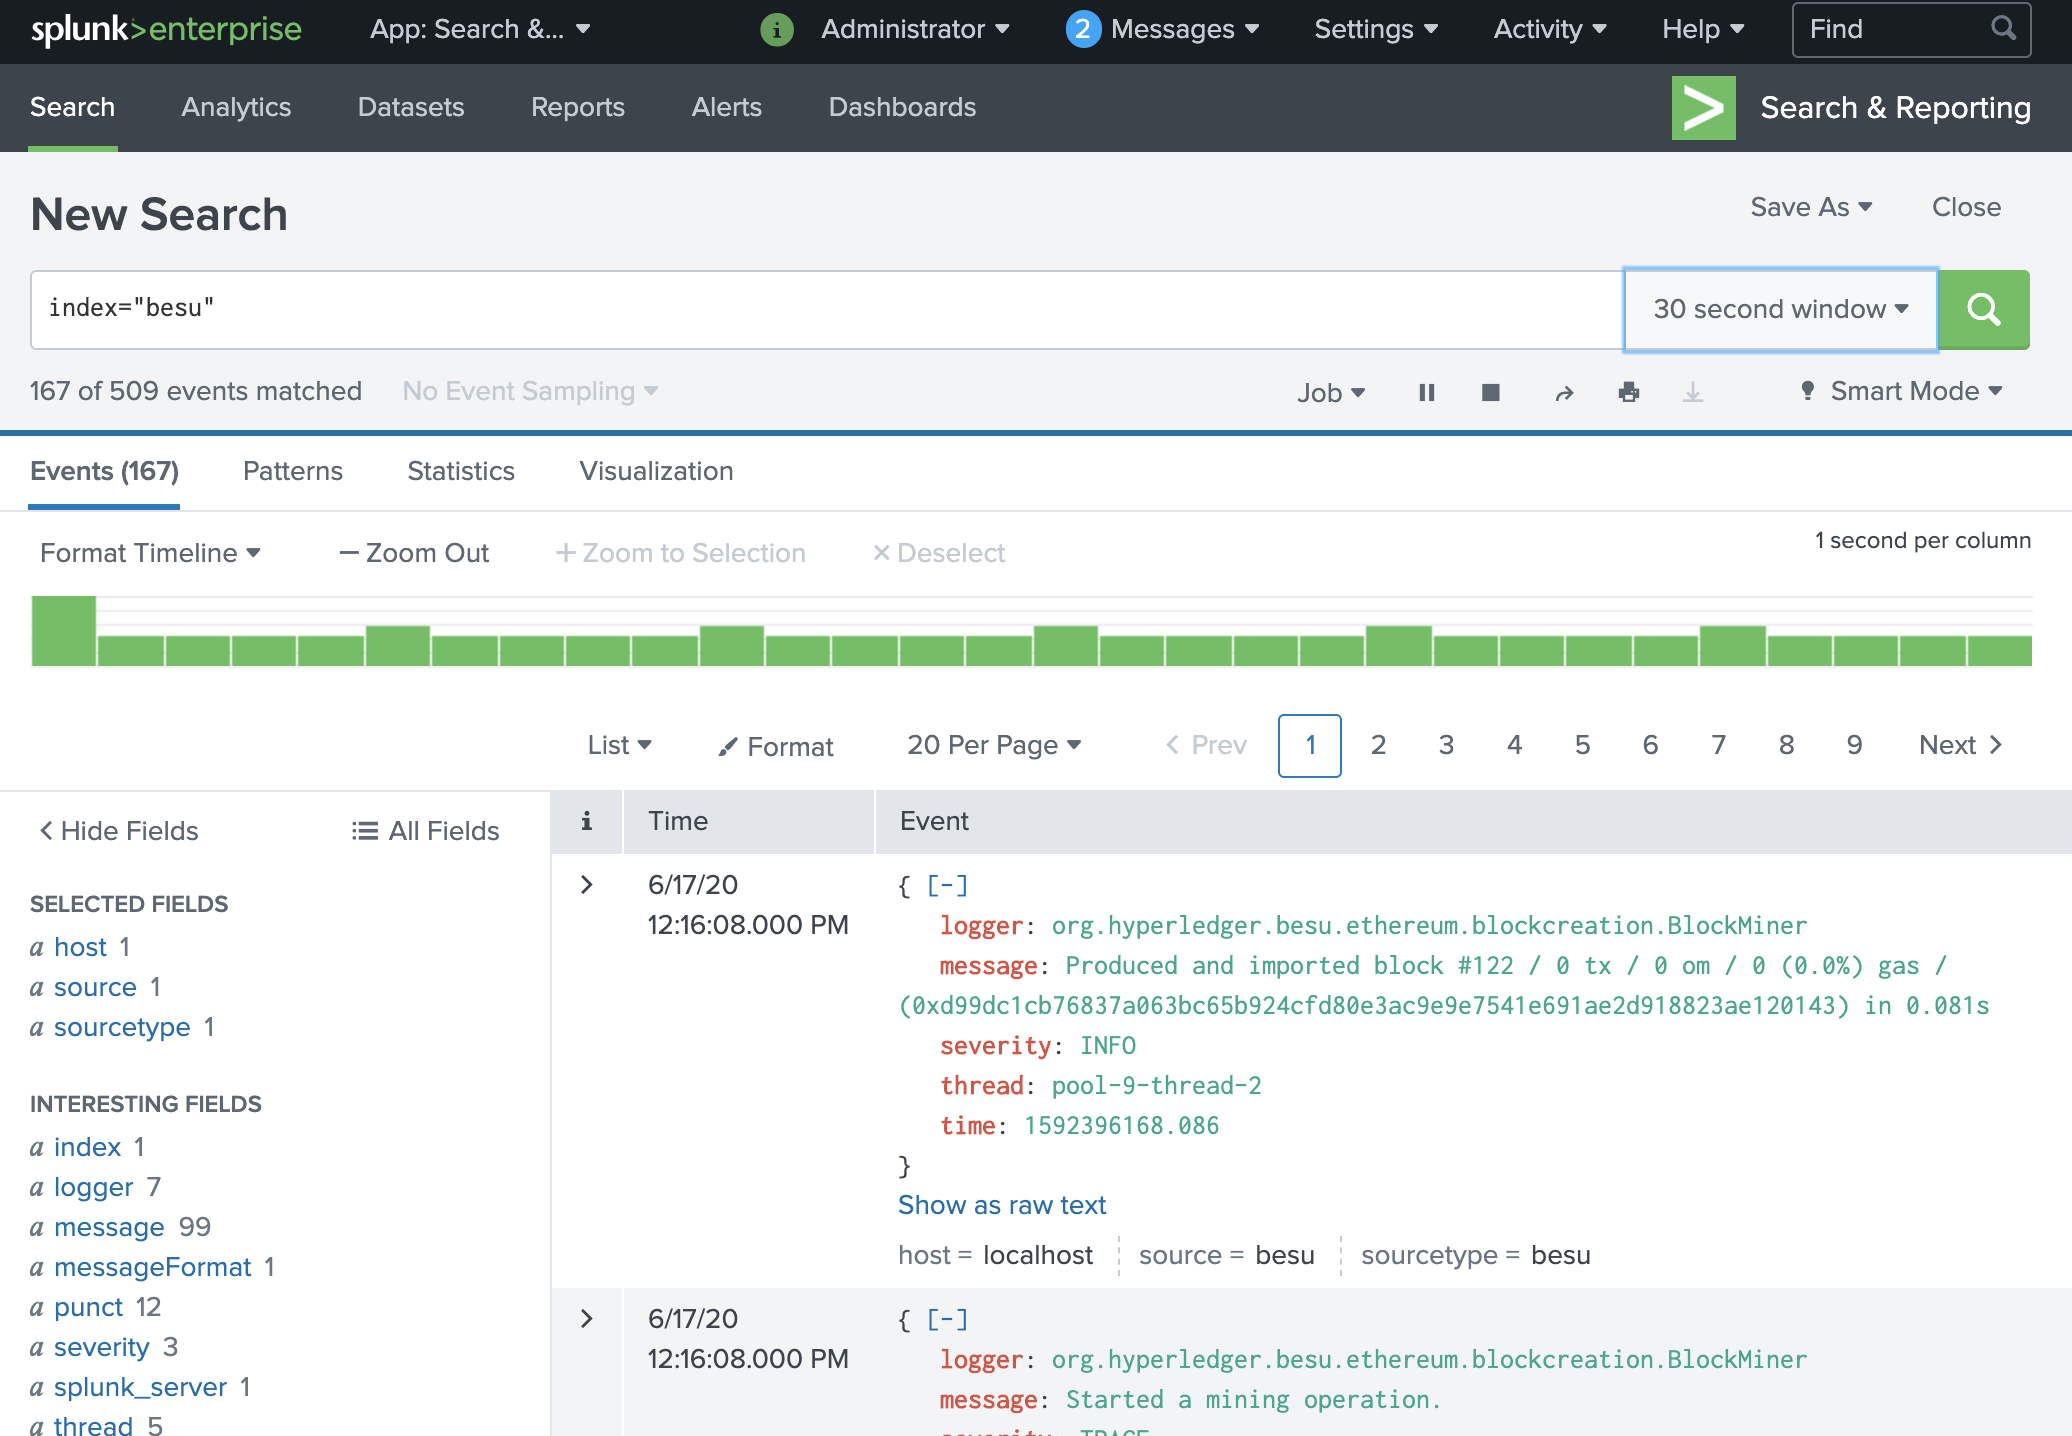
In the Splunk Web interface, navigate to the search page. Type
index="besu"in the search field. Log events sent by Besu are displayed.Congratulations! You can now play with the search and other Splunk features to explore your Besu logs.

-
Stop Besu with ++ctrl+c++. Stop the Splunk container with
docker stop splunk-demo.
Run a Splunk Enterprise instance
Prerequisites
- Splunk Enterprise license
- Besu 1.4.4 or later installed
Steps
-
Follow the steps in the Splunk Enterprise documentation to download, install, and run Splunk Enterprise.
-
After logging into the Splunk Enterprise Web interface, navigate to the settings to:
- Create an HTTP Event Collector.
- Create an event index named
besu.
-
Run Besu as in step 3 in using Splunk on Docker. Set the
SPLUNK_URLvalue to match the HTTP Event Collector address and port.You can display logs and use the search engine as in step 4 in using Splunk on Docker.
Splunk options reference
| Name | Description | Required |
|---|---|---|
| LOGGER | Set to Splunk to activate sending logs to Splunk. | Yes |
| HOST | Current host. If in a Docker environment, the default value is the docker container ID. Otherwise, the default value is localhost. | No |
| SPLUNK_URL | URL of the Splunk HTTP Event Collector. For example, use https://localhost:8088 | Yes |
| SPLUNK_TOKEN | Authentication token, usually of the form 11111111-1111-1111-1111-111111111111 | Yes |
| SPLUNK_INDEX | Index to store logs. Defaults to besu | No |
| SPLUNK_SOURCE | Source of the logs. Defaults to besu | No |
| SPLUNK_SOURCETYPE | Source type of the logs. Defaults to besu | No |
| SPLUNK_BATCH_SIZE_BYTES | Size of a log batch in bytes. Defaults to 65536 | No |
| SPLUNK_BATCH_SIZE_COUNT | Size of a log batch in number of events. Defaults to 1000 | No |
| SPLUNK_BATCH_INTERVAL | Interval at which to send log batches. Defaults to 500 | No |
| SPLUNK_SKIPTLSVERIFY | Whether to check the Splunk instance TLS certificate when sending data. Defaults to false | No |